HP Printer showing offline it is common issue in HP Printer. IF you have not connected printer and computer to check your network properly
Try to set the printer to online. Go to Settings and afterward Printers. Right-click on the printer icon and click Use Printer Online.
Double-click on printer icon, then select printer menu and click Cancel all documents.
There may be a stuck in print work. That would make the printer go disconnected.
Reboot the printer and computer. In case it doesn’t work, reinstall the driver.
Go to Setting choose your printer. Then right click on printer and choose Properties.
Go to General or Details tab. Search for the driver icon and select it.
Reinstall the printer. Under Printers in the Settings choose the printer at that point evacuate the printer and reinstall it through the Add printer wizard.
If you Follow all these step and your issue is solve other wise you need to help click here.
Belkin router is one of the most usable and best service providers in wireless internet connection and wired connected devices. Belkin router can connect up to 16 wireless devices. As we all know better nowadays the internet has become the most necessary thing and most people are using it for business or any earning purpose and for serving internet for using the router devices have been made up at daily bases. So now we talk about Belkin router this is also wireless internet serving device and most of the people are using it. But some users of Belkin has to be faced password issue and thinking about How to reset Belkin router password after forgot? If any user uses. Belkin router for using the wireless connection and due to some reason the user forgot their password and thinking about How to reset Belkin’s router password after forgot? For resetting the password, the users have tried a lot of times to find out the best and easy way to reset the password but the user is not able to reset it by own. If you are the same user who is needed to reset the password and the user is thinking constantly about How to reset Belkin’s router password after forgot? So firstly stop thinking or taking stress too much. Because if you have come on our page then it will be benefitted for you. Ways to recover the Belkin’s router password? after forgot easily: Now, in this area we did share some easy and beneficial points with help from any person (who does not a technical person) can solve the password.
issue easily. They need just to read out given tips and follow and apply it exactly as we shared. After, the Belkin user will be able to Belkin’s router password after
Forgot without paying to anyone.
1. Please open the Belkin router login page on any browser. 2. Fill the login information without filling the password field. 3. Now, open the wireless option which will be given left side then, click the security. 4. Now, you will be able to check your Belkin password. 5. You can be easily able to check your Belkin password. 6. Now you can connect any device with the same password as much you more.
Belkin Support If any person is doing a mistake or due to some fault the Belkin user is not able to reset Belkin’s router password after forgot. And due to that, the user is not able
to open their Belkin account as well as using that. So now the time has come the user should call on Belkin support phone number and should be talking with the Belkin
Experts and should be taking help from the technicians. After talking with the certified technical person your problem will be solved out without wasting time. If your problem is not solved. you contact our Belkin router Technical Support Number a certified technician can help you and find your eject problem, issue and solve. The certified technician solves problems in several minutes.
Turbotax is the most popular and branded software as we all know as well. Which mainly focuses on calculating taxes and returns only? Indeed, for cutting the tax more than or few whatever any person can take maximum advantage. Furthermore, every information should be getting reviewed. Some users of Turbotax sometimes, face error and think about How to resolve Turbotax error code 65535? Some users get to come out of the very easy way to resolve Turbotax error code 65535? Easily within taking less period but some are not. It all depends or their mentality or can say personally efforts. Well, Turbotax software is so good and easy to use and benefit for their users always. That’s why most of the people are using Turbotax and are using it much. Before telling you the removing method of your Turbotax error code 65535 we are telling you its Symptoms or reasons means “Why any user has to face error code related to Turbotax software”.
Once the data information has been filled it up and does enable after, little bit change with the number of information.
If once e-file out, after you may mistake not to update on time.
If on Mac or Windows whatever you do use, the software is not installed properly by mistake.
While installing, not any error code issue got to raise.
Sometimes, it may be due to Windows update which did not on time.
Your system does not give to permit to allow to run income tax return software.
It may be due to the software outdated version which did not update on time ever.
Probably the system or install software is not responding fast so due to that reason you have to be faced Turbotax error code 65535.
Due to any corrupt files or installation, this error may be shown on screen.
While installing with or without a CD drive.
So be relax and don’t worry, it’s a very common issue and anytime maybe happened with any software. Easy ways to remove Turbotax error code 65535: Now in this section, we are sharing its resolving methods which can help you to fix your issue of Turbotax software. Please go through the exact and follow then apply. After Turbotax error code 65535 may be gone. Method: 1
Please open the official link of Turbotax and download the tool to fix it from there.
Now, wait to complete the process.
When it setup file will be located on the download folder please open that once.
Please follow the guidance for completing the process properly.M’ Method: 2 Disable the Task Manager services for a while
Press the key together (cntr+shift+esc) now the task manager window will be opened.
You can open it to press the key (cntr+alt+del) and you can go manually on the task manager window via the start menu.
Now, the option is available at the bottom more details please click on that.
Now, the list will be shown on your screen please select the right option from there. and then click on the option of the End task.
Now, please find out all Msiexec.exe files and when you will get it to please click on that after a click on the end task option.
Now, you will be able to install Turbotax software again via CD or located file as per on you depends. If after following above the all steps or methods still you are facing Turbotax error code 65535 please now you should be taking help from the Turbotax experts. Turbotax Support Help If by bad luck, any person is not able to get understand the easy points and the person did follow and apply all methods to resolve Turbotax error code 65535 but not able to fix it back. In that case, the user can call on Turbotax Support Help Phone Number and take technical person help from Turbotax Support Help.
Spectrum gives the quality high-speed internet link over routers, wifi and modems as well. Spectrum gives excellent service. whenever the user can turn on their home modem or router into a Common (public) Wi-Fi hotspot. If any wire connecting a device using spectrum wire link, Generally it’s will automatically change a public wifi hotspot. But Sometimes spectrum users seeing password changing problems with their wifi attachment or modem devices,
Change Spectrum Wi-Fi password
Solution 1:
Flow these steps to change the Wi-Fi Password given below.
Go to Spectrum Website and open a new tab and entering http://www.spectrum.com. Then entering user name and password.
After that open Menu here select and hit the Manage Account option.
Now, Go to internet option and hit.
After that, Select and View information about Device.
Now you will be able to see your spectrum Network information as like name, password.
Next to changing the password and click on the Save option.
Solution 2:
How to Attach to Your Wireless Network
You can easily to connect your wireless network. Follow these steps to given below to connect, optimize and customize your Wifi Network.
Now activate your connection and attach your devices.
Now you have need connect the devices and activate your service, flow to given step by step instruction in your self-installation kit, or select the correct link below.
Connect your device to your Wireless Network.
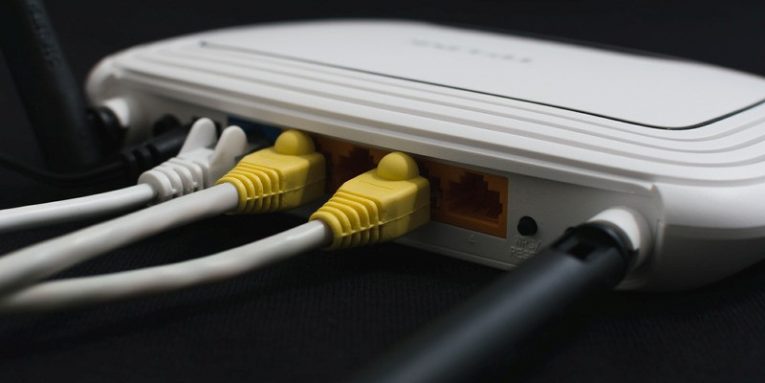
1. See your device backside level and find the Issued WiFi Network Name (SSID) and password by Spectrum router.
2. Open the Wifi setting on your wireless device as like mobile phone, laptop and other device and select the fit 5 GHz or 2.4 GHz network to connect.
If you see the two name of wifi network you can select one according to your need and select it.
2.4 GHz has provided a longer range of wireless range, but speed is slower.
5GHz has provided shorter range wireless area but speed is faster.
3. After that see the backside of Spectrum router a default password is showing and inter it. The available password is the same for applying 5 GHz or 2.4 GHz.
We confirm that you personalized your WiFi network name and password so you can do it.
Connect all device to connect using network name and password.
Get it more comfortable to remember.
Note: Personalize your all details in your Spectrum.net as like WiFi Network Password and WiFi Network Name Account below the Services tab for the Internet.
You are not Proper to personalize your WiFi Network Password and Name through the help of your Spectrum Account. Now Visite Spectrum Website and Find your Equipment and flow the given instruction to Customize.
Solution 3:
Optimize Your WiFi Network
1. Always away WiFi router from household electronics as like microwaves, baby monitors and wireless headsets. Always put it Central location in your home.
2. If you Creating customer network names, put 5GHZ and 2GHZ mention at the end of the name so you clear mention to which network you want to use in different devices.
3. If you update Spectrum password and name do not match previous network password and name, all your home equipment should connect when the network password and name updates.
You can see your WiFi network name and password:
My Spectrum App — Select Services > Internet.
Spectrum.net Account — Select My Internet > Manage WiFi Settings.
Internet Explorer (IE) is a “World Wide Web” (WWW) browser is the most popular that comes bundled with the Microsoft Windows operating system (OS).
All of the love with Internet Explorer, Is not it? But, still, Sometimes when we all have to use Internet Explorer(But, Using another Internet browser as like Fire Fox and Chrome). Many persons of Microsoft Internet Explorer users have reported ‘Internet Explorer has Stopped Working‘ and show Error or Internet Explorer has crashed. In these types of problems and crashes largely comes from broken .dll files interrupting the iexplore.exe file. The Difficulty of Microsoft Internet Explorer has always has been dependence on .dll files.
Note: If you have already installed Norton Antivirus in your computer, you have directly solved these problems ‘# 2’ and it would fix everything for you.
You can Solve the problems in Internet Explorer stopped working Errors and Stop crashing. Flow the given instruction below.
How to Fix Internet Explorer has stopped working in Windows 7
Reset Internet Explorer
Load Internet Explorer in your PC
Then Go to Tools Menu.
Now Hit Internet Options and Hit ‘Advanced’ Tab.
Hit ‘Reset’ Button and check “Delete Personal Settings”. Then after Hit the Reset button.
Restart the Internet Explorer. In this step, the problems in fix Internet Explorer crashing and
Fix Internet Explorer has stopped working error in Windows 7 or 8.
Finding and Deleting the wrong .dll file
Now, again we have found and wipe off the error in manually .dll that doing all reasons and damage Internet Explorer to stop working. For that, follow certain steps.
Right Click on This PC (My Computer) and Hit “Manage”. Then select and expand “Event Viewer”
Hit and Expand “Windows Logs” Under Windows Logs, Hit on ‘Application’.
See the right side the of the screen a long log list is showing.
Then after you try to find an error with Red Cross over It is caused by .dll and iexplorer.exe.
This mistake is one which was created and logged when Internet Explorer quit working. Find the proper related error it’s must be important. If you obtain any error, the file name .dll Extension mentioned in the logs. Note and remember the name of the file.
If you want to delete or repair this file. ( To Delete the .dll file Boot your computer in the safe mode).
Resetting Security Zone
Internet Explorer stopped working error cause also time mismatch and Security zones. Now you can update Internet Explorer Security zone by heading over to Settings in the Internet options.
Hit “Security” Tab and Hit “Reset all zones to default level”.
Making HTML 5 as Default Player
Internet Explorer has stopped working error and Internet Explorer crashing difficulty is also created during video playing from YouTube.
Internet Explorer has useless with Adobe and Flash, so you have tried to the best option to solve these problem update to HTML 5 player for default. Here’s how to do it.
At the lower part of this page, you will see “Request the HTML 5” Player.
Hit this button and you will make this player as the default player in Internet Explorer. Firstly you confirm you have Internet Explorer 11 and above for a soft experience. In those option to you can fix Internet Explorer has stopped working Windows 7, Windows 8 problems. This solves your Internet Explorer crashing problem.
Let us tell me in case of any problem through the comment.
You using Turbo Tax Software you notice some time windows files are corrupted and showing registry failure notice. Then you some changes apply. You are seeing the Turbo Tax Error 65535. Due to showing these types of error, you would not be authorised to enter the company file. You are not able to fill e-filing the return as next to impossible for you. so you make sure you fix it as possible soon as soon.
TurboTax Install Error Code 65535: Some Common Causes or Reasons:
If the system is affected by wrong installation or registry of the files
If the device has been hit by viruses or Malware
If there is an incomplete installation of the applications or programs
Turbo Tax one of the best top-selling tax preparation software in the market. Turbo Tax software program uses to fill taxes online with 100% Correctness. Turbo Tax is a best But sometimes showing Error, Sometimes it showing Error code as like “65535” with Turbo Tax software program. Another way I think Actually, 65535 Error come to because software installation is not proper or download corrupt of Turbo Tax Software. Malware or Virus may be a cause of the corruption of software or changes of software windows registry change of corruption. IF you find Some issue in this related problem either follow the given instruction to get Turbo Tax Helpline Service to solve this problem.
Step 1: Firstly You are Repair all Registry entries related with error 65535.
Step 2: Together with the first step you will full scan and conduct malware off your computer.
Step 3: Clean up your computers junk files like temp files and folders.
Step 4: Update your Computer Device and drivers.
Step 5: To “Fix” most recent System changes, use windows system replace.
Step 6: Uninstall and reinstall the Turbo Tax Program again, Which is associated with it error 65535
Step 7: Run Windows System File Checker to be specific “sfc/scannow”
Step 8: Update all attempted Windows updates
Step 9: Execute your computer system with a clean installation of windows.
Contact TurboTax Support for troubleshooting TurboTax Error 65535
Now, You do not solve these issues while troubleshooting the error code in the installation of Turbo Tax, You Feel to Free to get in touch with the Turbo Tax technical experts.
The Ricoh Printer showing offline Printer it is a general Issue. This types of error showing many Reasons. This is the General Reasons as like USB connection check or technical issue such as hardware fault, this type of error can be tiring. Now, these types off error can be fixed very easily. you can just by dialling the Ricoh Support Number available on the techvaultsolution.com. Here, you get the help of all brands including Ricoh Printers. If you have been facing Ricoh printer offline problem then you can contact the technical team. The customer care offline will get an overview of the problem and will connect to the technicians. The technical support team will solve your problem in an instant.
Why Choose Ricoh printer support?
The Support at available techvaultsolution is very responsive and helpful. Here support provides by a highly skilled technician and experts. Both work in connection and make the best exercises to solve the problems of the customers. Without any problem, customers can have solved the Ricoh Printer Issue instantly.
Aside from the world-class helps the customers get the enjoy the cost-effectiveness as one of the major benefits of using the services at the Ricoh Printer Help.
The Ricoh Printers are known for there effectiveness work and light-built. The users use their printers in the personal and professional set up. The Ricoh Printer offline is a repeated problem disregardless of the IT devices one uses. There are many reasons. If the user knows this issue he can find a quick solve this problem.
There is common Issue in the Ricoh Printer are given below.
Step 1: USB Connection: USB Cable is not properly connected. Or the computer connection is broken between the printer. It is required to remove the all wiring or USB Connection and reconnect all the cable and USB. Reboot the computer system and begin printing again.
Step 2: Paper jamming: The Most Common Second reason paper jamming behind the printer offline. Papers are jamming into the tray, the printer stops the print. Open the Printer and Unload the papers and use the direction guidebook to fix the problems.
Step 3: Printer settings: At many time printers settings are changed and Printer is also available online automatically. Go to “Printer and Devices” choose options the ” My printers” uncheck the box saying “use printer offline” Here should be brought the printer online.
The customers can take help any time Our Helpline is available 24 hours a day, 7 days a week Ricoh Printer Support.
Belkin routers started around 1983 in a garage. It’s easy to user interface wired and wireless router both. Belkin routers easily navigate and its good performance making it one of top manufactures router both wired and wireless.
How to open port in Belkin Router.
The configuration is easy to do in Most Belkin routers and includes the port forwarding section. In these routers have 10 Connecting spots wherever you can forward a port to connectable devices.
You can’t advance the scope of ports, only each in turn. This is a true problem if you want to forward a high number of ports or a range of ports.
Almost router includes a built-in firewall designed to protect a network from virus attack a critical feature for businesses,
Hence an unsecured network to proper provide. Hence an unsecured network does not provide the proper security to confidential files its easily enable hackers to intercept confidential information.
Firewall responsible for all inbound ports comes on a network, which is responsible for determining where network traffic should be routed, connect to work station safely, some services or application like Remote Desktop, for instance, need to use these blocked ports to communicate with a service. If your computers in your office can connect to wireless internet through a Belkin router, You open some ports on the router to make certain applications accessible easily.
1. Open a browser and type into the address bar. ” http://192.168.2.1 ” — Remove the quotes — and press Enter.
2. Click login and put your administrative details.
3. Select “Virtual Servers” from under “Firewall.” Select “Allow” and afterwards go into the “Description” field the name of the application or administration utilizing the inbound port.
4. Go into the “Inbound Port” lists the appropriate port or port range afterwards copy the data in the “Private Port” fields. Select “TCP”, “UDP” or “BOTH” Starting from the drop menu, Depending on which protocol to port users.
5. Go into “Private IP Address” the location of the workstation you want to access it.
6. Apply Changes to Belkin router. Hit Apply Changes to open the port or ports on the router.
If you want any query or problem to can’t access Belkin Router you can contact Technical Support.
The Error 0x8024401c is common one of the adored and largest failure Error of the Windows OS. Normally these types of error appear in the Windows Operating System(OS). If the system is unable to download and install Windows Updates.
WHY YOU GET UPDATE ERROR 0X8024401C
If you are facing an error “0x8024401c” this means your system is damaged. This means error usually occurs some following causes:
Wrong registry entries.
The file is Corrupted or system file is broken.
Wrong installation.
Incomplete un-installation of software.
Unsuitable deletion of applications.
Replacement of hardware without proper procedure.
The updated error “0x8024401c” damage your windows operating system. Normally, the removed files in your operating system can result in causing such an error.
Some Viruses can generate to the same problem. sometimes when your computer directly shutdown then also some files can get damaged and as a result, you will see this error on your screen.
Windows and system 32 files when are damaged, generally you will show this error. Otherwise, new driver and software installations can generate error and hardware will be affected.
there are several reasons for fixing the error. follow this given instruction to fix the error.
Firstly Verify the network setting.
Update the Drivers Versions.
Finish SFC Scan
Go for a clean boot.
If you have any query or doubt related to these error resolution steps contact with Microsoft customer care support.
Step 1. Installation of Adequate Drivers
If you identify the error occurs due to this reason you can try uninstall of the generic drivers and reinstall again accorded by the manufactures of the driver. Follow this given instruction
Use the Windows + X key together
Then click on Device manager
Choose the driver not functioning/working
Click on the right and open properties
Also, Open the Details tab
Search Driver IDs that appears in the list on clicking over it.
Open the Driver tab and then uninstall the driver.
Select the first line and go to a web browser and paste and you see the original manufacturer.
Download the drivers and install successfully.
Reboot your computer system.
Step 2. Automatic Update of Drivers is Recommended
In, this process the Driver updater tool is automatically Update all driver differentiate every individual device of the computer automatically.
Step 3. Go for an SFC Scan Process:
Use Windows + X key mutually to open Command Prompt
Enter sfc/scannow going to the command section.
SFC scan begins and it will scan the files open and replace the corrupt or wrong files automatically.
Once you are sure that are identified you can attempt updating.
Step 4. Verify the Network Settings:
Use Windows + X key together and open the Network connections.
Click on the right on the link for eg.either LAN or Wi-Fi that you are using then select Properties.
Next to uncheck the iPv6 box and confirm the selection.
IF you want to activate windows 7 to without any Licence Activation key (CD-key), you Install in the trial mode. This trial mode maximum work last 30 days without any problem activating Windows through Microsoft Servers. But you using Windows in the trial period, Windows 7 keeps reminding activation messages, again and again, go to online. This massage appears right corner in the bottom near the clock. but This message will vanish when you have successfully activated Windows. but in the till you have to suffer from the nagging.
Install your Dell printer just because you lost your installation disc? Firstly go to Website of dell is updated including the feature of downloading a printer driver for free available. Select your suitable printer driver version and hit to download.
That means without the installation disc the printer is not useless.
Step 2. See Left side of website Click Support option.
Step 3. Now, the list of Option will display on the computer screen and choose “printer and multi” to go to the “Product Family” panel. Now select the “Product Series” and the applicable Product Series. Next is “Drivers and software” panel and choose the “driver and software” of Suitable Printer model you want on configure on the computer system.
Step 4. Hit and open the “Driver and Software” button and Scroll bar, and select the suitable software package and hit the download link.
Step 5. Ultimately, you click on the Downloaded file to the screen installation have to be completed your computer system.
Your dell printer fully to ready to use on your system.
Dell Support
If you are still not able to configure the installation problems facing the printer driver or the Dell printer, next you must directly contact the toll free dell technical support number.